

Oat milk, a popular dairy alternative, has taken the culinary world by storm with its creamy texture and versatility. Made from two essential ingredients (water and blended oats), it offers a lactose-free, nut-free, and environmentally friendly option for those seeking a plant-based milk substitute. But why opt for homemade oat milk instead of store-bought varieties? Creating oat milk at home allows you to customize its flavor, sweetness, and consistency to suit your preferences perfectly. Moreover, it gives you control over the ingredients, ensuring there are no unwanted additives or preservatives. Oh! I almost forgot to mention that homemade oat milk is cheaper than store-bought ones.
In this article, you will discover the art of crafting homemade oat milk like a pro, minus the unwanted slimy texture! If you’ve ever been put off by the less-than-pleasant consistency of some oat milk varieties, fret not—I am here to guide you through the secrets of achieving a flawlessly smooth homemade oat milk. I will unveil simple yet effective techniques that ensure your oat milk turns out silky and delightful, transforming your plant-based beverage experience. Say goodbye to slimy mishaps and hello to velvety-smooth oat milk that will elevate your creations and leave you craving for more. Let’s dive into the world of homemade oat milk mastery, where a creamy texture is just a few steps away!
The Benefits of Homemade Oat Milk
Nutrient-Rich Goodness: Oat milk is a powerhouse of nutrients, including fiber, vitamins, and minerals. By crafting your own oat milk at home, you can ensure that you retain these essential nutrients without the need for added artificial fortifications.
Heart-Healthy Choice: Beta-glucans, present in oats, have been linked to improved heart health by reducing cholesterol levels. Incorporating homemade oat milk into your diet may contribute to a healthier cardiovascular system.
Gentle on Digestion: Homemade oat milk is naturally gentle on the stomach and is an excellent option for individuals with lactose intolerance or sensitive digestive systems.
Homemade oat milk recipe
Ingredients:
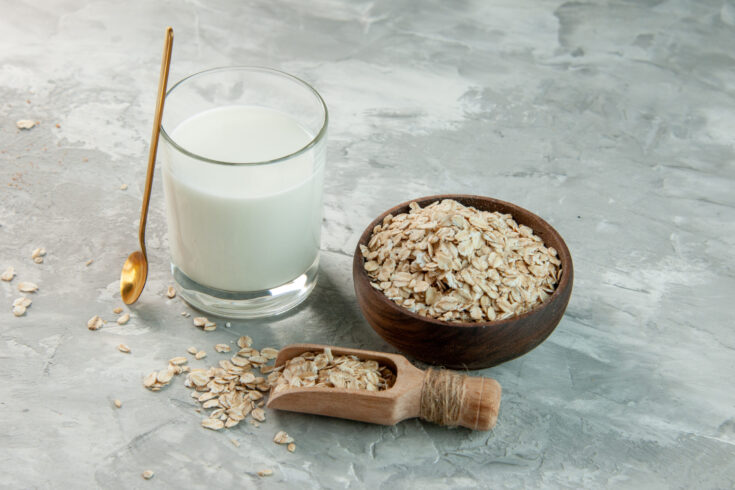
1 cup rolled oats
4 cups cold water
Optional:
Dates, honey, or maple syrup (for a hint of sweetness)
Cinnamon and a pinch of salt (flavor enhancers)
Equipment:
Blender
A nut milk bag, a fine mesh strainer, or a clean t-shirt
The Blissful Blend: Making Homemade Oat Milk
Preparation: Gather all your ingredients. Place 1 cup of oats in the blender container.
Sweeten the Deal: To infuse your oat milk with a hint of natural sweetness, add 1 tablespoon of maple syrup or 2 pitted dates to the blender. Adjust the quantity based on your preferred level of sweetness.
A Pinch of Flavor: Incorporate a pinch of salt to enhance the overall taste of your oat milk. Salt helps balance flavors and bring out the natural sweetness.
Cinnamon Infusion: For a delightful twist, sprinkle in 1/2 teaspoon of ground cinnamon. Cinnamon adds a warm and aromatic flavor to your oat milk.
Cold Water Magic: Cold water is the key to achieving a smooth and refreshing oat milk consistency. Add 4 cups of cold water to the blender, ensuring that the water is truly cold for optimal results.
Blend to Perfection: Secure the lid of your blender and blend the mixture on high speed for about 30 seconds. This step ensures that the oats break down completely, resulting in a creamy and velvety oat milk base.
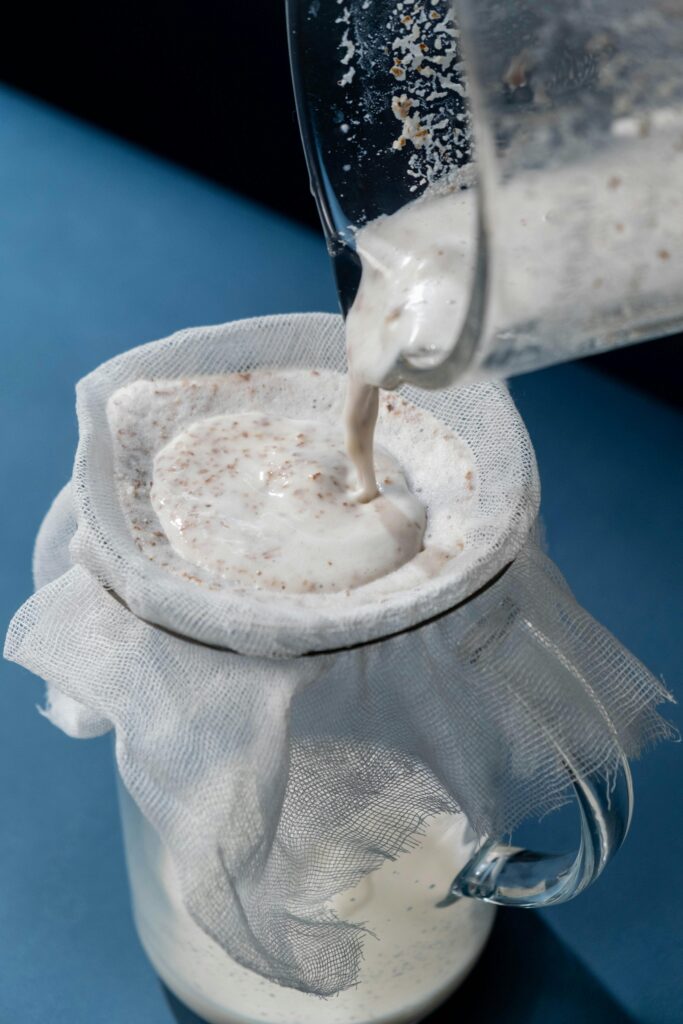
First Strain: To eliminate any oat particles and ensure a creamy texture, strain the blended mixture through a nut milk bag, a fine mesh strainer, or a clean t-shirt.
Second Strain for Silkiness: For an ultra-smooth oat milk, consider giving it a second strain. This meticulous step guarantees a luxurious and velvety finish.
Savor the creaminess: Transfer the strained oat milk into a clean container and refrigerate. Shake well before each use, as homemade oat milk can naturally separate. Ready to be enjoyed in your morning coffee, cereal bowls, or favorite recipes.
Check out this mango chia pudding parfait.
Homemade oat milk calories
Homemade oat milk is not only a delectable dairy-free alternative but also a wise choice for those conscious of their calorie intake. A typical serving of homemade oat milk, approximately 1 cup (240 ml), contains around 120 calories. This calorie count can vary slightly based on factors such as the amount of oats used and any additional flavorings or sweeteners incorporated into the recipe. Compared to traditional cow’s milk, which contains about 150 calories per cup, homemade oat milk offers a lighter option while providing a creamy texture and delightful taste. By crafting your oat milk at home, you have the flexibility to control the ingredients and tailor the calorie content to suit your dietary preferences. Whether enjoyed on its own, in coffee, or as a base for smoothies and recipes, homemade oat milk offers a satisfyingly flavorful experience with a mindful approach to calories.
FAQs
How do I prevent a slimy texture in my oat milk?
Sliminess in oat milk can occur due to the starches present in oats. While some methods suggest soaking oats to reduce this texture, I highly don’t recommend it. Here are alternative ways to address sliminess without soaking.
- Type of oats: Rolled oats (same as old-fashioned oats) are generally the best type of oats to use for making oat milk. They blend well and produce a smooth consistency without excessive sliminess. Instant oats can work too, but they might result in a slightly thinner texture. Avoid using steel-cut oats, as they can be too coarse and lead to a gritty texture in the oat milk.
- Use super cold water: Utilizing very cold water when making oat milk is crucial as it prevents the oat mixture from becoming overly gooey or sticky. The low temperature restricts the release of excessive starch from the oats, leading to a smoother and less dense consistency in the oat milk. Furthermore, using super-cold water helps retain the oats’ nutritional value and imparts a more vibrant, less cooked taste to the end result.
- Proper Blending: Ensure that you blend the oats and water mixture thoroughly for only 30 seconds. Proper blending breaks down the oats and disperses their components more evenly, reducing the chances of sliminess. Over-blending can lead to oat milk that’s overly thick and potentially slimy.
- Straining Technique: Over-squeezing homemade oat milk during the straining process can indeed contribute to a slimy texture. The sliminess occurs when too much starch is released from the oats, creating a gel-like consistency. While thorough straining is crucial to achieving a smooth texture, excessive pressure can lead to unwanted sliminess.
Tip: When straining, aim for a balance between extracting the liquid and avoiding excessive pressure. Squeezing too hard can lead to sliminess, so focus on a controlled and gentle technique.
- Temperature Considerations: Sliminess might also be influenced by temperature changes. Rapid shifts in temperature can affect the texture of oat milk, so store it consistently in the refrigerator.
2. Why does my homemade oat milk separate?
Homemade oat milk can occasionally separate, leaving a layer of liquid on top and some sediment at the bottom. This separation is a natural occurrence and can be attributed to a few key factors. Firstly, homemade oat milk lacks the stabilizers and emulsifiers found in commercial versions, allowing the natural components to settle over time. Temperature fluctuations, such as moving from the fridge to room temperature, can also trigger separation. Furthermore, the duration of storage can influence the extent of separation, as denser particles tend to settle with time. While these factors can lead to separation, a simple shake before use can easily reintegrate the components, restoring your oat milk to a uniform consistency.
3. How long does homemade oat milk last?
When it comes to its shelf life, homemade oat milk typically remains fresh for about 4–5 days when stored correctly in the refrigerator. However, the duration may vary slightly depending on factors like temperature consistency and any added sweeteners or flavorings. To ensure the longest possible shelf life, store your oat milk in a clean, airtight container and keep it refrigerated at a consistent temperature.
Silky Smooth Homemade Oat Milk Recipe: Say Goodbye to Slimy Texture
Ingredients
- 1 cup rolled oats
- 4 cups cold water
Optional
- Dates, honey, or maple syrup (for a hint of sweetness)
- Cinnamon, and a pinch of salt (flavor enhancers).
Instructions
- Preparation: Gather all your ingredients. Place
your 1 cup of oats in the blender container. - Sweeten the Deal: To infuse your oat milk with a hint of natural sweetness, add 1 tablespoon of maple syrup or 2 pitted dates to the blender. Adjust the quantity based on your preferred level of sweetness.
- A Pinch of Flavor: Incorporate a pinch of salt to enhance the overall taste of your oat milk. Salt helps balance flavors and bring out the natural sweetness.
- Cinnamon Infusion: For a delightful twist, sprinkle in 1/2 teaspoon of ground cinnamon. Cinnamon adds a warm and aromatic flavor to your oat milk.
- Cold Water Magic: Cold water is the key to achieving a smooth and refreshing oat milk consistency. Add 4 cups of cold water to the blender, ensuring that the water is truly cold for optimal results.
- Blend to Perfection: Secure the lid of your blender and blend the mixture on high speed for about 30 seconds. This step ensures that the oats break down completely, resulting in a creamy and velvety oat milk base.
- First Strain: To eliminate any oat particles and ensure a creamy texture, strain the blended mixture through a nut milk bag, fine mesh strainer, or a clean t-shirt.
- Seconds Strain for Silkiness: For an ultra-smooth oat milk, consider giving it a second strain. This meticulous step guarantees a luxurious and velvety finish.
- Savor the Creaminess: Transfer the strained oat milk into a clean container and refrigerate. Shake well before each use, as homemade oat milk can naturally separate. Ready to be enjoyed in your morning coffee, cereal bowls, or favorite recipes.
Notes
Use in smoothies, baking, and more. Enjoy!
In case of any concerns, the article above will thoroughly guide you on achieving a silky smooth homemade oat milk.


